Arrow

Posts on this site are never sponsored.

In-browser screenshots made easy with the Picnik Firefox plugin

Ah, the Picnik love-in continues. I previously introduced Picnik’s features when I talked about a half-finished Picnik WordPress plugin. Basically, Picnik is an in-browser photo editor. Lately I discovered the Picnik Firefox plugin, which adds even more functionality!

Suppose you need to take a screenshot of a page. Normally, you need to press whatever handy shortcut your operating system has to take the screenshot, and then open your photo editing program to edit the file. The Picnik Firefox plugin makes this easier as it adds a Picnik menu item when you right-click anywhere on a page:

Picnik menu item in Firefox

Click the appropriate menu item to take a screenshot and the Picnik gears start turning:

(Note that you can also right click an image on a page and send it to Picnik for editing, which is also pretty cool.)

Picnik editor loading

A few seconds later, the Picnik editor has loaded, where you can do all kinds of fun things like crop and resize the screenshot, add text to it, and apply filters.

Picnik editor

When you are finished editing, you have a multitude of options, like saving the screenshot to your computer, sending it to Facebook or Flickr, or e-mailing it to someone.

Plainly: a green, right sidebar, widget-friendly free theme for WordPress

When I first started Peter’s Useful Crap (this site), I wanted it to look like Plain 1.0, which was a nice CSS template but not yet a WordPress theme (and has since been removed from the site of the creator — Jay). Unfortunately, knowing little about WordPress or about CSS, my attempted hack didn’t turn out so well (I mean, look at the mess that is theblog.ca).

A year and a half later, I’ve finally got something going on the theme and am offering it up for free under the name “Plainly”. The real work was done by Jay, who created the original Plain 1.0 theme. This Plainly theme looks a lot better than my current site’s theme…

Screenshot of Plainly

Plainly is not an exact port of Plain 1.0 and has a few modifications, of course. I used the WordPress Default Kubrick theme (the one that is displayed when you first install WordPress) as a base and included a few of my own design tweaks (like the way code snippets are displayed when you use the <pre> tag… which I stole from eZ Systems).

Without further ado…

Download the Plainly theme [December 19th, 2007]. Simply extract the zip file into the wp-content/themes/ directory, then activate it as you normally would in the WordPress admin panel (under the Presentation menu).

[December 19th, 2007: Added conditional statements for the tagging functions so that the plugin is compatible with pre-WordPress 2.3 blogs]
[December 1st, 2007: First version]

Update: this theme is now posted on wpthemesfree.com :D (why is themes.wordpress.net always broken?)

Tips for a socially responsible Christmas

Shake those winter blues and have a personally socially responsible (PSR?) Christmas this year!

Don’t use traditional wrapping paper as it cannot be recycled. Instead, the Winter 2007 edition of Granville Magazine suggests giving gifts in reusable shopping bags (such as those by Solegear Design). It also suggests looking into furoshiki, which is origami-meets-fabric art. The Ministry of the Environment Government of Japan has a even posted a PDF guide on how to wrap presents, furoshiki style. Or hey, just use paper bags or shoe boxes and decorate them — at least they provide more of a blank canvas than newspaper! For the even more adventurous, why not use a cereal box (a friendly Cheerios bee?) or a tissue box (a nice floral pattern)? And it’s what’s inside that counts anyway, right, both inside the wrapping and inside the person :P

Give the “green” alternative to the Entertainment Book: Green Zebra Vancouver. There are savings in the book for places with sustainable food, clothing, service (like spa stuff), and other (like paint) initiatives.

For the friends who appreciate benevolence, donate some money to a worthy charity in their names. Or, convince each other to check out Kiva.org, an innovative setup where you can give interest-free micro-loans to entrepreneurs in the developing world.

Get a solar charger for your friends’ cell phones or read GoodCleanTech for other cool ecotechnology tidbits and gifts (like a solar charger backpack).

Spend your free time expanding your vocabulary while donating rice. At FreeRice, whenever you get a vocabulary question right, corporate sponsors donate 10 grains of rice through the United Nations to hungry people. I wish the corporations would just donate the rice regardless, but hey, if this is what spurs generosity, I won’t complain.

Putting up Christmas lights? Put both indoor and outdoor lights on a timer. Do people need to see your lights at 3am? (Submitted by Julia).

Failing all of that, just donate to your local food bank or give some jackets or socks to those who need them!

Got any other tips? Let me know!

Or, if none of these tips appeal to you, just be nice to everybody! Give hugs and tell people you miss them!

How to bypass / omit the collections view in Plogger

Plogger is a nifty little photo gallery script for those who want to host their own photos. I used to be a fan of Gallery but the simplicity and essential features of Plogger are far more attractive.

Anyway, Plogger structures a gallery as follows:

Collections > Albums > Photos

However, what if you only have a few albums and don’t necessarily wish to group them in collections? In other words, skip the collections view.

Suppose your gallery address is “funkypics.com/pictures”.The way it is currently set up, when you view the root of your photo gallery (“/pictures”), you view a list of collections, then you click on a collection to view a list of albums (“/pictures/?level=collection&id=1″), then you click on an album to view its photos (“/pictures/?level=album&id=2″). It would be more user-friendly to just bypass the collections step. In other words, when you access “/pictures”, you would automatically view “/pictures/?level=collection&id=1″.

Instead of hacking the core code (which complicates things when you upgrade software), you can bypass the collections level by using a rewrite rule. Rewrite rules basically change the URL that is processed by the server, given a particular circumstance. This is a bit different than simply redirecting a page and is often transparent to the user.

Here’s the code I use, which should be placed in a file called “.htaccess” in the root of your Plogger installation:

RewriteEngine On
# Only URLs without a query string (an example of a query string is "?album=1") will be rewritten
RewriteCond %{QUERY_STRING} ^$
# Rewrite all root directory requests to the album view 
RewriteRule !(.+)$ http://pathto/plogger/?level=collection&id=1 [L]

(This assumes that the ID of the only collection in your gallery is 1.)

In-browser, in-WordPress photo editing with Picnik

Picnik is a free in-browser, Flash-based photo editor. It contains the handy crop, resize, and rotate functions, as well as a wealth of filters, effects, and text and frame functions. What impressed me was how fast it loads and how lightweight it seems to be.

With its API, there is a great opportunity to write extensions to make it work with other applications, such as, say… your blog! Sometimes I have photos to upload to a post but it takes a while to load up a bloated desktop photo editor. For WordPress, plugins such as the WP Vivtiger Image Resizer enable you to work with images within your admin panel and are quite useful. Picnik could also integrate into your blog quite seamlessly. I hacked together a quick and dirty plugin that integrates Picnik and WordPress.

First, when you’re creating or editing a post, click the Picnik tab in the usual upload section:
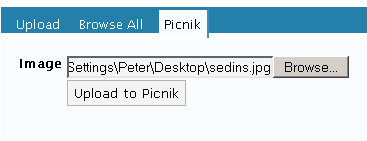
Basic upload screen

Once you’ve uploaded an image from your computer, you’ll be presented with the Picnik interface, fitting snugly into your WordPress window.
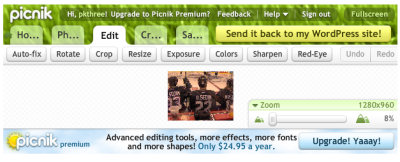
Picnik interface within WordPress

You probably can’t do much in this small window, so click the Fullscreen button in the top right of the Picnik interface. Once you are in fullscreen mode, note that there’s a nice bold Send it back to my WordPress site button for when you are done editing.

Fullscreen and Send it back to my WordPress site buttons

For this example, I cropped a photo, adding some text, applied the sepia filter, and added a frame. Now, I’m no photo editing expert, but these Picnik functions were accessible and quite easy to use…

Tweaking the image in the fullscreen Picnik view

Once you’ve sent the image back to WordPress, you can fill in the usual Title and Description fields for the image.
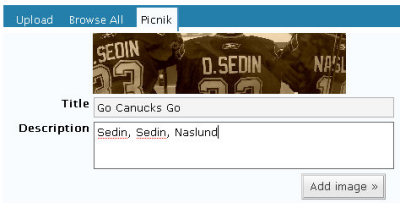
Entering the usual title and description fields

Then, use the usual WordPress interface to add the image to your post.
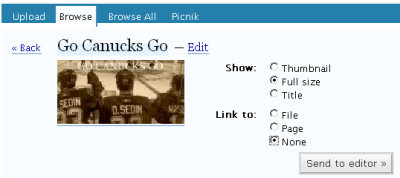
Using the usual WordPress interface to insert an image to a post

And finally, here’s the edited image, embedded into a blog post!

Final product image of the Canucks

You can download the WordPress-Picnik plugin here (it’s unofficial… ’twas me who made it after all). Note that you will need to get a free Picnik API key and enter it into the $picnik_api setting near the top of the plugin file (it’s the only setting). Then, just upload it to your WordPress plugins folder and activate it!

There are some massive limitations to my plugin in that it won’t edit images that you’ve already uploaded to your blog, and the coding is probably a bit shaky because I hacked together parts of the WordPress files upload code. I have no intention of providing support for the plugin or on developing it further. However, it works for me as demonstrated above and can serve as a good starting basis for further development (please steal any of the code and improve it — I’ll be happy to publicize your version!).